Encountering a "DNS Server Not Responding" error when attempting to access a website can be frustrating. Fortunately, this issue is often easy to fix, whether you're on Windows or macOS. Here's an in-depth guide tailored to VPN users and tech-savvy individuals looking for clear and actionable steps to resolve this common error.

What Does the "DNS Server Not Responding" Error Mean?
This issue relates to the Domain Name System (DNS), often described as the internet's "address book." The DNS is responsible for converting human-readable domain names (e.g., "example.com") into the numerical IP addresses computers use to locate websites.
When the DNS fails to perform this conversion, your connection to the intended website is blocked, resulting in the error message. This issue often stems from misconfigurations, connectivity problems, or temporary server outages. However, with the right approach, you can typically resolve it on your own.
Effective Solutions to Fix the "DNS Server Not Responding" Error
Here’s a step-by-step breakdown of nine methods to troubleshoot and solve this issue.
1. Diagnose Your Network Connection
First, confirm that your network is functioning properly. Running a diagnostic tool can reveal underlying internet connection problems.
For Windows
- Open the Control Panel, go to Network and Sharing Center under "Network and Internet."
- Click Troubleshoot Problems, then choose Internet Connections.
- Select Run the Troubleshooter and follow its instructions to resolve any identified issues.
For macOS
- Close all open applications, connect to the problematic network, and press the "Option" key while clicking the Wi-Fi icon.
- Select Open Wireless Diagnostics.
- Follow the on-screen instructions. Afterward, examine the entries in the summary window for actionable solutions.
2. Restart Your Router
Often, router issues cause DNS errors. Restart your device by powering it off, unplugging it, waiting 30 seconds, then plugging it back in and turning it on.
After rebooting, try accessing the website again to see if the issue persists.
3. Flush the DNS Cache
The DNS cache stores previous lookups of websites to speed up connections. Sometimes, clearing this cache eliminates lingering issues or outdated entries.
For Windows
- Press the Windows + R keys to open the Run command.
- Type `cmd` and hit Enter to access Command Prompt.
- Type `ipconfig /flushdns`, then press Enter. A confirmation will notify you the flush was successful.
For macOS
Use Terminal to clear the DNS cache. Depending on your macOS version, execute the appropriate command:
For Big Sur and newer versions, enter:
```
sudo dscacheutil -flushcache; sudo killall -HUP mDNSResponder
```
If clearing the cache doesn't help, move on to other solutions.
4. Try Alternate Browsers or Devices
Switching browsers (e.g., from Chrome to Firefox) can determine if the issue is tied to a specific browser. Alternatively, test the website on a different device that's connected to the same Wi-Fi. If the site works on the second device, the issue is likely browser-related, not network-related.
5. Temporarily Disable Extra Network Connections
Disable any unused network connections to avoid conflicts that may disrupt DNS performance.
For Windows
Press Windows + R and type `ncpa.cpl`.
Right-click on inactive networks and select Disable.
Ensure only your current Wi-Fi is active before retrying the website.
For macOS
Navigate to System Settings > Network via the Apple menu.
Disable all unused connections except your active Wi-Fi, then try reconnecting.
6. Switch to an Alternate DNS Server
If the default DNS server provided by your ISP is unreliable, consider using a public DNS like Google DNS or Cloudflare DNS.
- Access your network configuration settings.
- For Windows, do this via the Network and Internet section in the Control Panel.
- On macOS, locate DNS servers in System Preferences.
2. Replace the current DNS addresses with the following:
- Google DNS: `8.8.8.8` and `8.8.4.4`
- Cloudflare DNS: `1.1.1.1` and `1.0.0.1`
7. Disable Your Antivirus Software or Firewall Temporarily
Antivirus or firewall software can mistakenly block connections, triggering DNS errors. Temporarily disable these programs to identify if they’re the cause. Ensure you re-enable the software after testing.
8. Update Your Network Drivers
Outdated or corrupted network drivers may cause connectivity problems. Ensure your drivers are updated to the latest version.
For Windows
- Open Device Manager, then expand Network Adapters.
Right-click your active adapter and select Update Driver. - macOS users typically receive driver updates through system updates.
9. Use a VPN as an Alternative
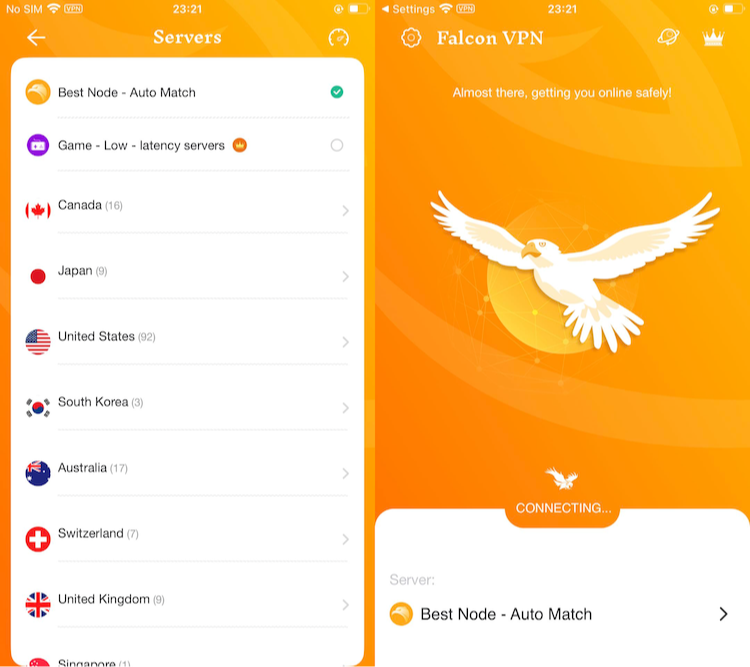
VPNs provide their dedicated DNS servers, bypassing your ISP’s DNS. A reliable VPN like Falcon VPN allows you to fix DNS errors while safeguarding your online privacy. Simply activate the free VPN, choose a server, and reconnect to the problematic website.
A VPN not only resolves DNS-related issues but adds extra encryption for secure browsing.
If you’re looking for a simple and effective solution, consider Falcon VPN. It offers fast, secure browsing and solves DNS-related issues without the hassle. Download Falcon VPN in just a few steps:

Modify Your DNS Server Settings
Your default DNS server, provided by your Internet Service Provider (ISP), might not work as reliably with VPN services. Switching to a public DNS server, such as Google Public DNS, often improves connection reliability and speeds.
Steps for Windows Users
- Press "Windows" + "R" to open the Run dialog box.
- Type `ncpa.cpl` and hit Enter to bring up network connections.
- Locate your active Wi-Fi connection, right-click, and choose "Properties."
- Select "Internet Protocol Version 4 (TCP/IPv4)" and click on "Properties" again.
- Check "Use the following DNS server addresses" and input Google's Free DNS servers:
- Preferred DNS server: `8.8.8.8`
- Alternate DNS server: `8.8.4.4`
Enable "Validate settings upon exit," then click "OK."
Steps for macOS Users
- Navigate to "System Settings" from the Apple menu and select "Network."
- Choose your active network, click on "Details," then "DNS."
- Tap the "+" icon to add alternative addresses like `8.8.8.8` and `8.8.4.4`.
- Confirm by clicking "OK" and "Apply".
Restart your system or VPN and test your connection to confirm the issue is resolved.
Update Your Network Drivers
Your network adapter drivers could be incompatible or outdated, leading to connectivity problems.
For Windows:
- Right-click the “Start” menu and select “Device Manager.”
- Expand "Network adapters" to view all listed adapters (e.g., wireless and Ethernet drivers).
- Locate the adapter you’re using, right-click, and choose “Update Driver.”
- Allow Windows to search for updates. If no updates solve the problem, disable and re-enable the adapter to reset its functionality.
For macOS:
- Turn Wi-Fi off from the AirPort icon on the desktop and wait at least 60 seconds before reactivating it.
- Alternatively, ensure macOS is running the latest system updates to maintain driver compatibility
Disable IPv6
Most VPN services rely on the older IPv4 protocol, as the newer IPv6 isn’t supported universally. Disabling IPv6 could resolve conflicts between your VPN and websites.
Disable on Windows
- Open "Network and Sharing Center” from the Control Panel.
- Click "Change adapter settings" and right-click your active Wi-Fi connection to select "Properties."
- Uncheck "Internet Protocol Version 6 (TCP/IPv6)” and click "OK." Restart your computer afterward.
Disable on macOS
- Head to "System Settings" > "Network," then select your active connection.
- Under "TCP/IP," set “Configure IPv6” to "Link-local only" and save your changes.
Temporarily Disable Security Features
Sometimes, antivirus software, firewalls, or VPN configurations interfere with DNS functionality. Temporarily disabling these programs can help identify the cause of the issue.
For Windows:
- Open “Settings” and go to “Updates and Security.”
- Under “Windows Security,” disable firewalls or antivirus temporarily.
- To pause VPN encryption, disconnect it from "Network and Internet" > “VPN,” and then reconnect to test your DNS stability.
For macOS:
- Open "System Preferences" and locate “Privacy and Security."
- Deactivate the firewall temporarily and try reconnecting your internet with the VPN.
Always remember to reactivate these security measures after testing to maintain a protected internet environment.
Restart in Safe Mode
Safe mode disables unnecessary software, allowing you to pinpoint whether a third-party program is causing DNS conflicts.
Access Safe Mode on Windows:
- Click the “Start” menu, hold "Shift," and select "Restart.”
- From the “Troubleshoot” screen, access “Advanced Options,” followed by “Startup Settings.”
- Press “F5” to enable safe mode with networking and verify your DNS.
Access Safe Mode on macOS:
- Shut down your Mac and reboot it while holding the "Shift" key.
- Log in as usual, then test internet connectivity. If the VPN works in Safe Mode, the issue likely stems from third-party applications that
- require uninstalling.
Why Does This Happen?
Several factors may contribute to seeing the “DNS server not responding” error while using VPN services, including the following:
- Network Issues: Weak signals or misconfigured settings disrupt traffic between servers.
- Firewall or Antivirus Barriers: Strict security rules may block essential DNS or VPN communications.
- DNS Downtime: Sometimes, public DNS servers face outages. Switching to an alternative can keep things running smoothly.
Final Thoughts
Encountering DNS errors doesn’t mean abandoning your VPN! With a few adjustments, you can troubleshoot and resolve these issues quickly. Whether by updating network drivers, changing DNS servers, or adjusting IPv6 settings, resolving these common problems ensures uninterrupted protection and performance with your VPN.
Have you tried these fixes and want a more seamless VPN browsing experience? Explore advanced VPN solutions that optimize your connection while maintaining maximum security!

Albert Ivan, writer by day, popper by night, is the former senior editor at iTop VPN. He Joined Falcon VPN in 2022 and has since written extensively on the topic of tech, digital privacy & security and internet freedom.


